A tool for synchronizing local and remote files is called Rsync, which stands for remote sync. By only moving the portions of files that have changed, an algorithm reduces the quantity of data copied. Here, we’ll describe Rsync, go through its syntax, show you how to use it to sync with a remote system, and go over some other choices you have. To securely replicate files to another location Rsync over SSH plays an important role.
The command-line utility Rsync is effective and flexible for synchronizing files and directories between a local computer and a distant server. For managing data backups, website deployments, and file synchronization activities, Rsync has emerged as the go-to option thanks to its effective data transmission and capacity to resume interrupted transfers. You can effortlessly keep your local and remote folders in sync by following the instructions in this guide as they will take you through each stage of using Rsync efficiently.
Recognizing Rsync
A particularly adaptable network-enabled synchronizing tool is Rsync. It’s included by default on the majority of Linux distributions due to its widespread use on Linux and Unix-like systems and popularity as a tool for system scripts.
Recognizing the Rsync Syntax
Similar to other tools like ssh, scp, and cp, rsync uses syntax. Run the following command to first change into your home directory:
cd ~
Create a test directory:
mkdir dir1
Another Test Directory:
mkdir dir2
Adding some Test Files:
touch dir1/file{1..100}
There are 100 empty files in the dir1 directory at the moment. Verify by listing the files out:
ls dir1

You also have a directory named dir2 that is empty. Using rsync and the -r parameter, which stands for “recursive” and is required for directory syncing, you can sync the contents of dir1 to dir2 on the same system:
rsync -r dir1/ dir2
Another choice is to use the combination flag -a, which stands for “archive” and is a combination flag. Recursively synchronizing while maintaining symbolic links, special and device files, modification dates, groups, owners, and permissions is possible with this flag. It is the suggested flag to use because it is more frequently employed than -r. Use the -a flag when running the same command as in the previous example:
rsync -a dir1/ dir2
Please take note that the first argument in the syntax of the previous two commands ends with a trailing slash (/), which is noted here:
rsync -a dir1/ dir2
This final slash indicates that dir1’s contents are indicated. Without it, dir1, which contains the directory, would be contained within dir2. The result would provide a hierarchy along these lines:

Checking your arguments twice before running a rsync command is another piece of advice. Passing the -n or –dry-run options to Rsync will enable a means for carrying out this action. To receive the right output, the “verbose” flag, denoted by the -v flag, is also required. The following command combines the a, n, and v flags:
rsync -anv dir1/ dir2

Afterward, contrast that result with the one you get when you remove the trailing slash, as in
rsync -anv dir1 dir2

This output now shows that the directory itself was transferred in addition to the directory’s contents.
How to Sync with a Remote System Using Rsync
You simply need SSH access set up between your local and remote workstations, along with rsync installed on both systems, to utilize rsync to sync with a remote system. Following the verification of SSH access between the two machines, you can use the following syntax to sync the dir1 folder from the previous section to a distant workstation. The trailing slash will be omitted in this case since you wish to transmit the actual directory:
rsync -a ~/dir1 username@remote_host:destination_directory
Because it “pushes” a directory from the local system to the distant system, this procedure is known as a push operation. Pull, which operates in the reverse direction, is used to sync a distant directory with the local system. The syntax would be as follows if the dir1 directory were on the distant system rather than your local system:
rsync -a username@remote_host:/home/username/dir1 placTransfer Files Rsync Over SSHe_to_sync_on_local_machine
The source is always the first parameter, much like with CP and related tools, and the destination is always the second. If you need to transfer files Rsync Over SSH this can help you definitely.
Other Rsync Option Use
The flag settings you learned about in the preceding section are just one of the many options Rsync offers for changing the utility’s default behavior.
You can lessen the network transmission if you’re transferring files that haven’t been compressed, like text files.
rsync -az source destination
Furthermore, the -P flag is useful. The flag’s progress and partial are combined. A progress bar for the transfers is provided by the first flag, and you can pick up where you left off with the second flag:
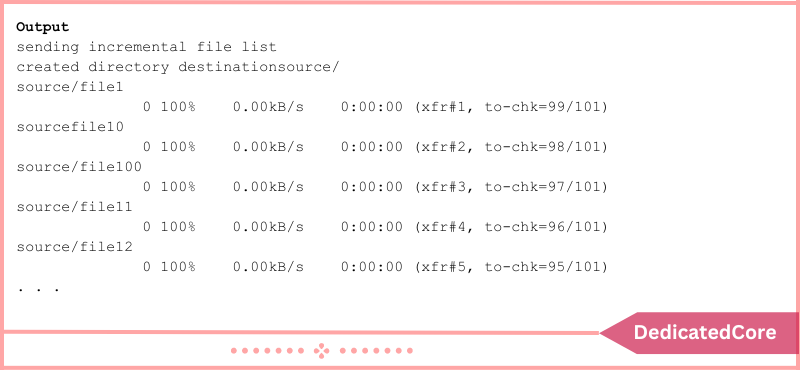
rsync -azP source destination

The output will be truncated if you run the command again because nothing has changed. The following gives an example of how Rsync can use modification times to assess whether changes have been made:
rsync -azP source destination

Imagine you wanted to use a command like the one below to update the modification time on some of the files:
$ touch dir1/file{1..10}
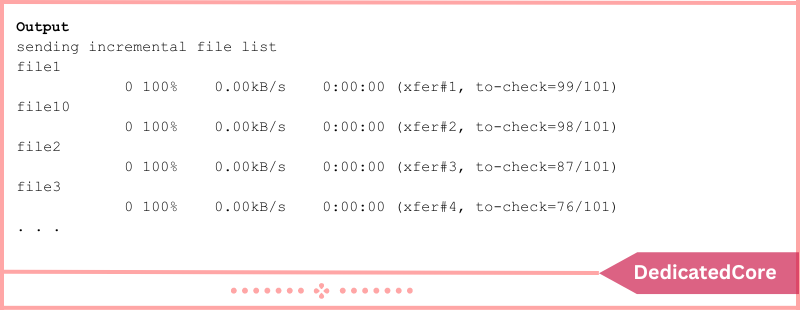
The result will show how smartly Rsync recopies only the modified files if you run it again with the -azP flag:
rsync -azP source destination

It’s required to remove files from the destination directory if they are deleted from the source directory in order to keep two directories genuinely in sync. Rsync does not normally remove anything from the destination directory by default.
By selecting the –delete option, you can alter this behavior. To test this option first and avoid unintended data loss, use the –dry-run option with the -n flag:
$ rsync -an --delete source destination
When synchronizing a directory, you can choose to exclude specific files or directories by putting them in a comma-separated list after the –exclude= option:
$ rsync -a --exclude=pattern_to_exclude source destination
Using the –include= option, you can override an exclusion for files that match a different pattern if you have a pattern to exclude:
$ rsync -a --exclude=pattern_to_exclude --include=pattern_to_include source destination
Finally, essential files can be stored in backups using the –backup option of Rsync. When combined with the –backup-dir option, which designates the directory in which the backup files should be kept, it is used as follows:
rsync -a --delete --backup --backup-dir=/path/to/backups /path/to/source destination
Conclusion
Using Rsync can make networked file transfers faster and local directory syncing more reliable. Because of its adaptability, Rsync is a solid choice for a wide range of file-level operations. You can create intricate backup procedures and get granular control over how and what is transferred by mastering Rsync. For synchronizing local and remote directories, Rsync offers a reliable and effective solution.
It is a useful tool for managing backups, installing websites, and maintaining file updates due to its ability to transfer only altered or new files and its resume capabilities. You can make the most of Rsync and guarantee smooth synchronization between your local PC and remote server by following the instructions provided in this article. Take advantage of Rsync’s power to streamline your file management activities and maintain data integrity across all of your platforms.

