
Web development, data analysis, machine learning, and automation are a few applications. that use the popular and adaptable programming language Python. The most recent version of Python, Python 3, may be easily installed on Ubuntu systems, a widely used Linux distribution. You can follow the instructions in this tutorial for Python installation on Ubuntu 18.04 or 20.04.
Operating system scripts are typically written in the popular programming language Python. It is sufficiently adaptable to be used in both web development and app creation. You may learn how to install Python 3.8 on Ubuntu 18.04 | 20.04 here. Before diving into managing versions of Python with Pyenv, it’s essential to first have Python 3 installed on your system, which is covered in another helpful guide.
Method 1: Using apt to Install Python 3 {Better Option}.
This method makes use of the apt package management to install Python. There are fewer processes, but they are sensitive to changes in hosting software from third parties. It’s possible that new releases won’t show as quickly in a third-party repository.
Python is often pre-installed in the factory editions of Ubuntu 18.04 or Ubuntu 20.04. Enter the following to check the Python version you are using: Continue to the next step if Python is not installed or the revision level is less than 3.7.x.
python --version
Step 1: Freshen and Update Repository Lists
Open a terminal window and enter the following commands to get started:
sudo apt update
Step 2: Install Reassuring Software
The software-properties-common package gives you more control over your package management by letting you add PPA (Personal Package Archive) repositories. Use the following command to install the auxiliary software:
sudo apt install software-properties-common

Step 3: Include Deadsnakes PPA
More latest releases are available than in the default Ubuntu repository through a PPA called Deadsnakes. To add the PPA, enter the information below:
sudo add-apt-repository ppa:deadsnakes/ppa
For the system to continue, you must press enter. Do that and let it finish. Update the package listings once more:
sudo apt update
Step 4: Setup Python 3
You can now start the installation of Python 3.8 with the command:
sudo apt install python3.8
Check to see if the Python version was successfully installed by allowing the procedure to finish:
python --version

Method 2: Install Python 3.7 Straight from the Source Code
This process involves downloading and compiling the developer’s source code. Accessing a more recent version of Python is the price to pay for the little increased complexity.
Step 1: Freshen up Local Repositories
Use this command to update local repositories:
sudo apt update
Step 2: Install Reassuring Software
For a package to be built from source code, extra software is required.
Type the following to install Python’s required packages:
sudo apt install build-essential zlib1g-dev libncurses5-dev libgdbm-dev libnss3-dev libssl-dev libreadline-dev libffi-dev wget

Step 3: Get the Most Recent Python Source Code version.
To download the most recent version of the Python source code, use the wget command and navigate to the /tmp directory:
cd /tmp
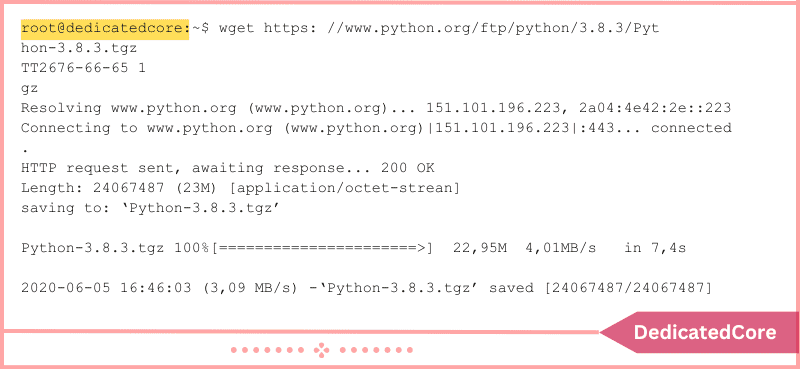
wget https://www.python.org/ftp/python/3.7.5/Python-3.7.5.tgz
Step 4: Get Compressed Files Out
Then, use the following command to extract the tgz file you downloaded:
tar -xf Python-3.8.3.tgz
Step 5: System Testing and Python Optimization
Make sure to test the system and optimize Python before you install the program. Python is evaluated and made ready for installation on your design using the./configure program. Code execution is accelerated by 10–20% when the –optimization option is used.
Put the following in:
cd python-3.8.3
./configure --enable-optimizations
Step 6: Installing a second Python Instance is Advised.
To establish a second Python 3.835 installation, incorporate the following into your current Python installation:
sudo make altinstall
You should employ the altinstall technique. Software packages on your Ubuntu system can be dependent on Python 2.x.
Step 7: Python Version Check
Put the following in:
python3 --version
Using Various Python Versions
Your machine is running two different Python versions simultaneously if you installed Python using the altinstall method. Every installation uses a unique command.
Use the Python command to carry out instructions for any Python 2.x version older than that on your machine.
python --version
To run a command in the more recent version, use python3. For instance:
python3 --version
There could be different major Python versions (3.x or 2.x) installed on your computer. The second digit can be used to select between Python 3.7.x and Python 3.8.x if you have both versions installed:
python3.7 --version
python3.8 --version
Final Thoughts on Installing Python 3 on Ubuntu 18.04 or 20.04
Python 3 may be easily installed on Ubuntu 18.04 or 20.04. Enabling you to use the Python programming language and its vast ecosystem of libraries and tools. You can ensure that Python 3 is correctly installed on your Ubuntu system. Following the instructions provided in this guide. To get securely updated, fix bugs, and get updated features you need to update Python to the latest version on CentOS.
The installation of Python 3 on your machine has been successfully verified. By looking up the Python version. When Python 3 is installed, you may use the python3 command to run Python scripts or the Python interpreter in the terminal to begin using it.
Python 3 should now be installed and operational on your Ubuntu machine. Next, if you haven’t already, consider installing PIP for Python. Once everything is ready, you can get started by learning some fundamentals. Like using Python’s built-in functions to handle files or getting the current time and date.