A strong foundation in Kubernetes, the industry-leading container proportion platform, is necessary. Before making containerized apps, note that CentOS 7 is very reliable and stable. It is a great host for launching a Kubernetes cluster. If you want to dive into container orchestration, you must know the terrain. Each tool has its unique strengths and ideal scenarios. Our in-depth analysis illuminates the features and applications of Kubernetes and Nomad. With insights at your fingertips, choose the perfect solution for your business.
Through a detailed tutorial designed for CentOS 7 users. This guide seeks to clarify the installation procedure. This guide offers crucial insights into setting up a Kubernetes cluster on CentOS 7. Opening the door for simplified container management, regardless of experience level with containers.
Easily manage and review your software. Follow tips on how to list installed Yum or RPM packages on CentOS. Containers in small virtual environments have proven essential for managing and creating applications. Using an isolated container to work on apps does not affect the host operating system. Containers are more efficient than virtual computers. They don’t need an OS. An open-source framework called Kubernetes facilitates the deployment and scaling. The management of resources among several containers.
Required Conditions
- CentOS 7 is being operated on several Linux servers (1 Master Node and multiple Worker Nodes).
- Every system should have a user account with root or sudo access.
- By default, the yum package manager is included.
- Terminal or command-line window
Steps to Install Kubernetes on CentOS 7
You must install a containerization engine to use Kubernetes. Docker is currently the most widely used container solution. On CentOS, Docker must be installed on both the Master and Worker Nodes.
Step 1: First, Set up the Kubernetes Repository.
You cannot obtain Kubernetes packages from the official CentOS 7 repositories. You must complete this step on the Master Node. As well as every Worker Node that you intend to use in your container configuration. The Kubernetes repositories can be retrieved by entering the following command.
cat <<EOF > /etc/yum.repos.d/kubernetes.repo
[kubernetes]
name=Kubernetes
baseurl=https://packages.cloud.google.com/yum/repos/kubernetes-el7-x86_64
enabled=1
gpgcheck=1
repo_gpgcheck=1
gpgkey=https://packages.cloud.google.com/yum/doc/yum-key.gpg https://packages.cloud.google.com/yum/doc/rpm-package-key.gpg
EOF
Step 2: Installing kubelet, kubeadm, and kubectl Now
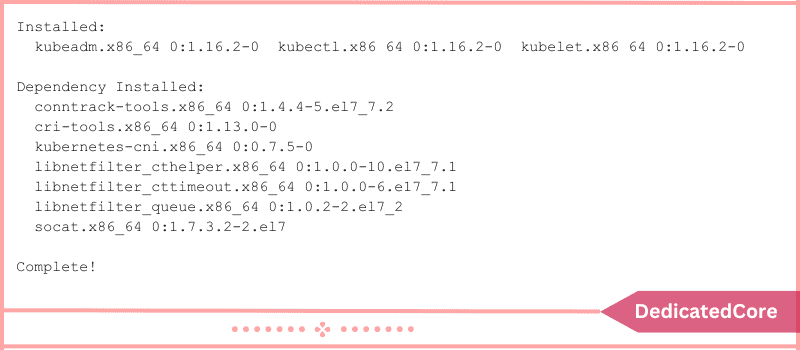
To utilize Kubernetes, you must have these three fundamental packages installed. Install the package(s) listed below on every node:
sudo yum install -y kubelet kubeadm kubectl
systemctl enable kubelet
systemctl start kubelet
Now that Kubernetes, together with its fundamental packages and tools, has been installed, it is operational.

Don’t forget to set hostnames, setup the firewall, and adjust kernel settings before cluster deployment.
Step 3: Configure Nodes Hostname
Use this command to assign each of your nodes a distinct hostname:
sudo hostnamectl set-hostname master-node
or
sudo hostnamectl set-hostname worker-node1
The worker node in this case is called worker-node1, while the master node is now called master-node.
To resolve the hostname for every node, create a host entry or DNS record:
sudo vi /etc/hosts
Alongside the entry:
192.168.1.10 master.phoenixnap.com master-node
192.168.1.20 node1. phoenixnap.com node1 worker-node
Step 4: Set Up Your Firewall
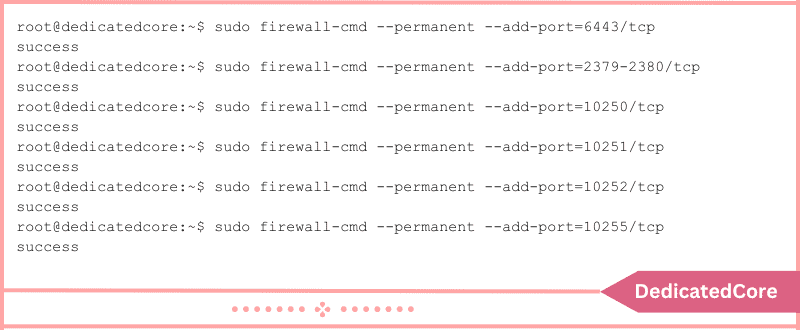
To carry out their tasks, the cluster’s nodes, containers, and pods must be able to communicate with one another. On the front end of CentOS, firewalld is activated by default. Enter the given commands to add the following ports.
Enter this on the Master Node:
sudo firewall-cmd --permanent --add-port=6443/tcp
sudo firewall-cmd --permanent --add-port=2379-2380/tcp
sudo firewall-cmd --permanent --add-port=10250/tcp
sudo firewall-cmd --permanent --add-port=10251/tcp
sudo firewall-cmd --permanent --add-port=10252/tcp
sudo firewall-cmd --permanent --add-port=10255/tcp
sudo firewall-cmd --reload
The system verifies each time a port is added by sending out a “success” message.

Each worker node should have the following commands entered:
sudo firewall-cmd --permanent --add-port=10251/tcp
sudo firewall-cmd --permanent --add-port=10255/tcp
firewall-cmd --reload
Step 5: Modify Iptables Configurations
In your Sysctl configuration file, set the net.bridge.bridge-nf-call-iptables to ‘1’. This guarantees that IP tables handle packets correctly while filtering and port forwarding.
cat <<EOF > /etc/sysctl.d/k8s.conf
net.bridge.bridge-nf-call-ip6tables = 1
net.bridge.bridge-nf-call-iptables = 1
EOF
sysctl --system
Step 6: Turn off SELinux
The host filesystem must be accessible to the containers. The permissive mode in SELinux is required to essentially turn off its security features.
The commands below can be used to turn off SELinux:
sudo setenforce 0
sudo sed -i ‘s/^SELINUX=enforcing$/SELINUX=permissive/’ /etc/selinux/config
Step 7: Turn off SWAP
Lastly, for the kubelet to function correctly, we must disable SWAP:
sudo sed -i '/swap/d' /etc/fstab
sudo swapoff -a
How a Kubernetes Cluster Is Deployed
Step 1: Use Kubeadm to Create a Cluster
To set up a cluster, run the following command:
sudo kubeadm init --pod-network-cidr=10.244.0.0/16
Depending on network speed, the process can take several minutes to finish. A kubeadm join message is displayed once this command is finished. Take note of the entry and utilize it when you eventually want to add worker nodes to the cluster.
Step 2: Utilize the Cluster Like a Typical User
You must run the cluster as a regular user to begin using it by typing:
mkdir -p $HOME/.kube
sudo cp -i /etc/kubernetes/admin.conf $HOME/.kube/config
sudo chown $(id -u):$(id -g) $HOME/.kube/config
Step3: Configure the Pod Network
Nodes in a cluster can communicate with one another thanks to a pod network. Kubernetes networking options are available in multiple varieties. Installing the flannel pod network add-on requires using the following command:
sudo kubectl apply -f https://raw.githubusercontent.com/coreos/flannel/master/Documentation/kube-flannel.yml
If you choose to use flannel, make sure that the traffic for the default port 8285 on your firewall is allowed.
Step 4: Verify the Cluster’s Status
On the master server, run the following command to see the nodes’ current status:
sudo kubectl get nodes
After installing a pod network, you may verify that it is operational by typing to see if the CoreDNS pod is running:
sudo kubectl get pods --all-namespaces
Step 5: Connect Worker Node to Cluster in this Step
To connect each worker node to the cluster, use the kubeadm join command, as shown in Step 1.
kubeadm join --discovery-token cfgrty.1234567890jyrfgd --discovery-token-ca-cert-hash sha256:1234..cdef 1.2.3.4:6443
Replace the original codes with those from your master server. Then, repeat these steps for each worker node in your cluster.
Final Words Installing Kubernetes Cluster on CentOS
In conclusion, you are now at the forefront of contemporary containerized infrastructure management. With the successful installation of a Kubernetes cluster on CentOS 7. With the help of this guide, you can build a reliable Kubernetes environment on a secure CentOS platform. Your CentOS 7-based Kubernetes cluster becomes a valuable tool.
When you start the process of directing containers. Helping to streamline the deployment, scaling, and administration of containerized applications. Accept your enhanced flexibility and skills as you negotiate the changing container proportion landscape.
As you wrap up this installation process, remember that you have created the foundation. For an ecosystem that encourages effectiveness. With durability, and flexibility as well as the configuration of a system. Accept the prospects that a Kubernetes cluster running on CentOS 7 offers. And set off on the fascinating journey of producing containerized solutions in the always-changing digital landscape.
Frequently Asked Questions (FAQ)
1. What’s the method for disabling SELinux on CentOS?
Run these commands to turn off SELinux:
sudo setenforce 0
sudo sed -i 's/^SELINUX=enforcing/SELINUX=permissive/' /etc/selinux/config
2. Is it required to deactivate the firewall for Kubernetes?
For seamless communication between your nodes, consider disabling the firewall. Or, allow Kubernetes-specific ports like 6443 and 2379-2380. This ensures smooth sailing across your cluster.

