
Git and other version control systems are crucial to contemporary software development best practices. Versioning allows you to keep track of your software’s source code. To create different versions of files and directories, you can branch, track changes, and go back in time. Git repositories are used to maintain many software projects’ data, and websites like GitHub, GitLab, and Bitbucket make it easier to share and collaborate on software development projects. Understand and put the current branch into a remote branch, basically a local to a remote repository, and learn the steps and methods to Push a Branch to Remote Repository in Git.
Version control is essential to effective teamwork and code management in the realm of modern software development. The way that developers track changes and collaborate on projects has been completely transformed by Git, a distributed version control system. This article will show you how to quickly install Git on your PC if you’re running Ubuntu 20.04 or 22.04. No of your level of programming expertise or where you are in your learning process, being able to install Git on an Ubuntu machine is a critical skill. Let’s get started with the steps so we can set you up for success. The trusted VPS hosting offers a memory-optimized configuration to run USA website smoothly with high amounts of RAM.
How to Install Git on Ubuntu
Git can be set up in one of two ways on Ubuntu:
- Install Git from the official Ubuntu repository using apt. The official Ubuntu package manager has an easy installation process, although it’s possible that the version in the repository isn’t the most recent.
- Install Git by starting from scratch. The installation method is more challenging, but the latest version with the most recent features and bug fixes is available.
Both approaches for installing Git on Ubuntu are demonstrated in the sections below. Choose the approach that best suits your requirements, then follow the instructions.
Method 1: Install Git on Ubuntu using apt.
Installing Git is made simple by using the apt package manager. The version in the default repository, however, is frequently not the most recent one. Skip down to installing from the source if you want to install the most recent release.
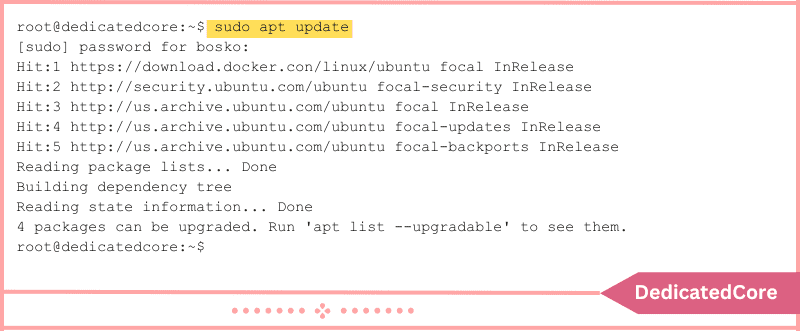
Step 1. First Update the System Package
Update the system package index first. Run the following command in a terminal window (Ctrl+Alt+T) to start:
sudo apt update
You can make sure you’re using the most recent software versions by updating the package index.
Step 2. Here will Install Git from the Default Ubuntu Repository.
sudo apt install git
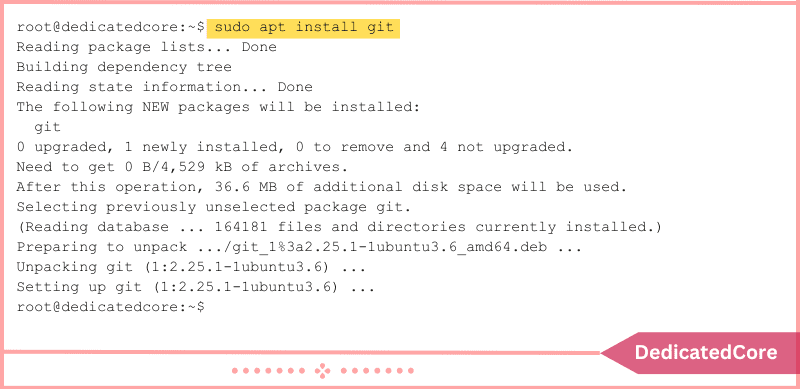
Allow the procedure to finish.
Step 3. Run the following to Confirm the Installation and Version:
git --version
If the program has been properly installed, the result will include the version number.

Method 2: Installing Git from Source Code on Ubuntu
Download and install the most recent version of Git from the source code to set it up on Ubuntu. The steps are as follows:
1. To begin, set up Ubuntu with the Requirements for Git Run:
sudo apt install make libssl-dev libghc-zlib-dev libcurl4-gnutls-dev libexpat1-dev gettext unzip -y
Hold off until the installation is finished.
2. Make a Fresh tmp Directory and Relocate there:
mkdir tmp
cd /tmp
3. Launch a Browser and go to the following Website Address:
https://mirrors.edge.kernel.org/pub/software/scm/git/
Find the version number for the most recent release (or another exact version you want to install) from the list of Git releases, and then type it into the command that follows:
curl -o git.tar.gz https://mirrors.edge.kernel.org/pub/software/scm/git/git-X.XX.X.tar.gz
For instance, the most recent version at the time this article was written was 2.38.1. Git version 2.38.1 will be downloaded using the curl command, and the downloaded file will be renamed to git.tar.gz:
curl -o git.tar.gz https://mirrors.edge.kernel.org/pub/software/scm/git/git-2.38.1.tar.gz
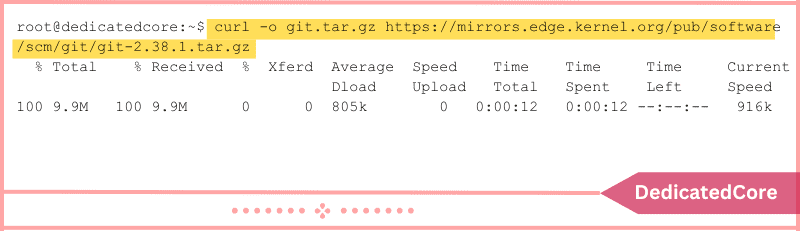
The Git tar file is downloaded using the command.
4. Run: to Uncompress the tarball File.
tar -zxf git.tar.gz
5. Change Directories:
cd git-*
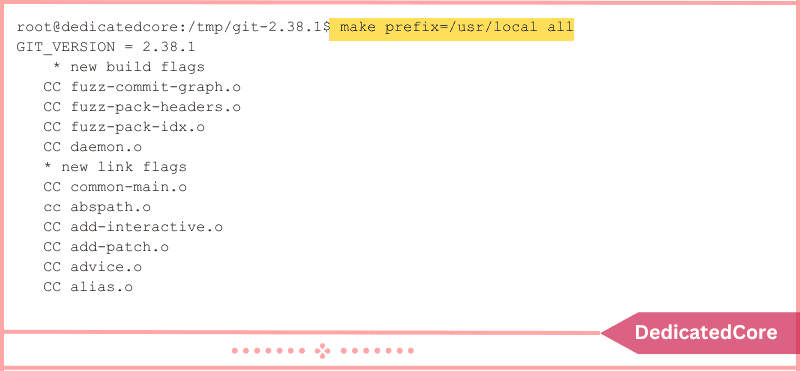
6. Run the Following Command to Compile the Package:
make prefix=/usr/local/
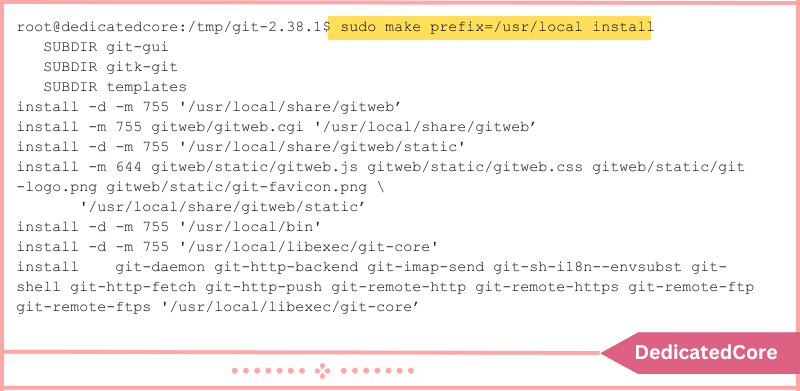
7. When the Procedure is Finished, Install Git by Executing:
sudo make prefix=/usr/local install
8. Run: to Validate the Git Installation.
git --version

After Installation Construct git on Ubuntu
1. When you need to change the existing name with your name and email address with your email address in the terminal window go with the command below:
git config --global user.name "your_name"
git config --global user.email "email@address.com"
2. Applying the Command below to Verify Configuration Changes
git config --list
With the command above there will be an output that displays the name and email address you have entered.

Wrapping Up Successfully Install Git on Ubuntu
You’ve successfully added Git, a crucial tool for contemporary software development, to your Ubuntu 20.04 or 22.04 system. Git gives you the ability to effectively manage your codebase, work with others without any problems, and keep track of all the changes you’ve made. Discover dedicated server hosting services across Europe to get rapid growth of projects with excellent worldwide connections.
You’ve made a crucial step toward improving your development workflow by following the instructions provided in this article. As you learn more about Git’s features and the realm of version control. You’re preparing yourself for more structured, team-based, and effective coding projects.
Frequently Asked Questions (FAQ)
1. Which Version of Git is Installed by Default on Ubuntu?
The version of Git depends on the Ubuntu release and its repositories. Use the following command to check the installed version:
git --version
2. How do I Uninstall Git from Ubuntu?
To Uninstall git on Ubuntu use the following command:
sudo apt remove git