
The use of vsftpd (Very Secure FTP Daemon) to set up an FTP (File Transfer Protocol) server on your Ubuntu system. It makes it simple to exchange data between computers wirelessly. FTP is still a dependable way to share files, and vsftpd is renowned for its speed and security. Besides this, if you are looking to grab network traffic in a format that a normal human can go through understand how wireshark can be installed on Ubuntu.
This article will show you how to install and set up vsftpd on an Ubuntu. So that you can have a reliable and effective FTP server ready for file transfers. It is impossible to match vsftpd’s simplicity for Ubuntu FTP server installation. When node.js hosting is integrated with MongoDB which offers a powerful runtime setting with a strong vps server for perfect execution.
File Transfer Protocol is referred to as FTP. In that it specifies a language for data transport across a network, it is comparable to HTTP (HyperText Transport Protocol). FTP is a poor option for secure data transmission because it is by default not encrypted. This tutorial will assist you in setting up a vsftpd-based FTP server on Ubuntu. A DedicatedCore’s dedicated server is the perfect platform in Germany to get manageable hosting plans as per requirements.
Requirements
- Access to a sudo-privileged user account.
- (Ctrl-Alt-T) access to a terminal window or command line.
- The apt package manager is preinstalled.
Truncate File in Linux
Step 1: Update System Packages First
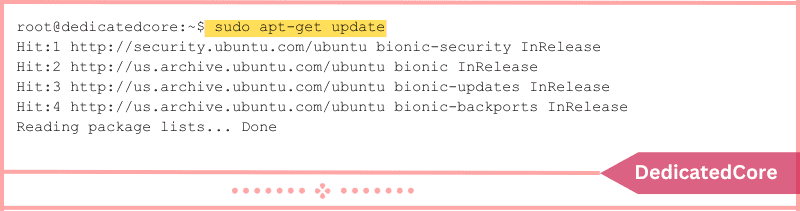
Update your repositories first by typing the commands below in a terminal window:
sudo apt update
The repositories are then updated by the system.
Step 2: Set up the Ubuntu vsftpd Server
Vsftpd is a popular open-source FTP program used in Ubuntu. It is suggested because of how simple it is to use.
1. Type the following command to install vsftpd:
sudo apt install vsftpd
This is an illustration of how Ubuntu output looks.

2. Run the following commands to start the service and make it available at startup.
sudo systemctl start vsftpd
sudo systemctl enable vsftpd
Step 3: Backup Configuration Files in Step Below.
Back up your configuration files before making any alterations.
1. Enter the following information to create a backup copy of the default configuration file:
sudo cp /etc/vsftpd.conf /etc/vsftpd.conf_default
Step 4: Create an FTP User after the above Step.
Make a new FTP user using the commands below:
sudo useradd -m testuser
sudo passwd testuser
For the newly created testuser account, the system ought to prompt you to enter a password.
Step 5: Configure Firewall to Allow FTP Traffic in Step
UFW, which is included with Ubuntu by default, will by default block FTP traffic. To enable FTP traffic on Ports 20 and 21, use the following commands:
sudo ufw allow 20/tcp
sudo ufw allow 21/tcp

Step 6: Connect to the Ubuntu FTP Server with Command Below
Make a connection to the FTP server by using the next command:
sudo ftp ubuntu-ftp
Change ubuntu-ftp to your system’s name (found on the command line). Use the testuser account and password you just created to log in. Your FTP server account should now be successfully logged in.
Setting Up and Protecting the Ubuntu vsftpd Server
Modify the Default Directory
The /srv/ftp directory is used as the default directory for the FTP server by default. By making a new directory and altering the FTP user’s home directory, you can change this.
Enter the following information to modify the FTP home directory:
sudo mkdir /srv/ftp/new_location
sudo usermod -d /srv/ftp/new_location ftp
To make the modifications effective, restart the vsftpd service:
sudo systemctl restart vsftpd.service
The /srv/ftp folder (if you left it as the default) or the /srv/ftp/new_location/ directory (if you modified it) can now contain any files you choose to transfer through FTP.)
Identify FTP Users
The following information should be added to the vsftpd.conf file if you wish to allow authenticated users to upload files:
sudo nano /etc/vsftpd.conf
Change the value of the entry with the label “write_enable=NO” to “YES.”

With the following, save the file, quit, and then restart the FTP service:
sudo systemctl restart vsftpd.service
The user is now able to edit files in their home directory.
Protecting FTP
Unsecured FTP servers are used as a target for numerous vulnerabilities. As a result, vsftpd.conf has many configuration options that can assist in safeguarding your FTP server.
User Access Limits
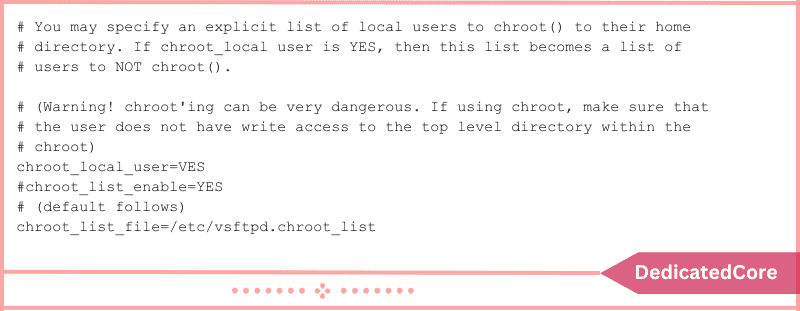
Limiting users to their home directory is one strategy. Uncomment the following command in an editor by opening the vsftpd.conf file:
chroot_local_user=YES
An illustration of a nano file is shown here:

Make a File Called User List
Edit /etc/vsftpd.chroot_list and add one user for each line to create a list file.
By modifying vsftpd.conf, instruct your FTP server to restrict this list of users to their home directories:
chroot_local_user=YES
chroot_list_file=/etc/vsftpd.chroot_list
The picture displays the changes that were made:
Restarting vsftpd is necessary:
sudo systemctl restart vsftpd.service
The list of FTP users who have been blocked by default is kept in the file /etc/ftpusers. Edit this file and add one blocked user in each line to add additional users.
FTPS Traffic Encryption
Encrypting the traffic on your FTP server is another way to make it secure. FTPS, or File Transfer Protocol over SSL (Secure Socket Layer), is used to do this.
Users must be given shell accounts on the FTP server for this to function. Your FTP communication will get a layer of safe encryption as a result.
1. Begin by using openssl to create a new certificate. Run the following command to do so:
sudo openssl req -x509 -nodes -days 365 -newkey rsa:2048 -keyout /etc/ssl/private/vsftpd.pem -out /etc/ssl/private/vsftpd.pem
2. When requested, enter the necessary information to maintain the default settings.
3. After that, update the vsftpd.conf file and replace the line ssl_enable=NO to ssl_enable=YES:
ssl_enable=YES
4. After that, insert the following text:
rsa_cert_file=/etc/ssl/private/vsftpd.pem
rsa_private_key_file=/etc/ssl/private/vsftpd.pem
allow_anon_ssl=NO
force_local_data_ssl=YES
force_local_logins_ssl=YES
ssl_tlsv1=YES
ssl_sslv2=NO
ssl_sslv3=NO
require_ssl_reuse=NO
ssl_ciphers=HIGH
pasv_min_port=40000
pasv_max_port=50000
5. Save your modifications and close the document.
6. To apply the changes, restart the service:
sudo systemctl restart vsftpd.service
Final Thought on Installing an FTP Server On Ubuntu with vsftpd
Creating an FTP server on your Ubuntu system with vsftpd installation offers a reliable option for file sharing and transfer requirements. You have successfully installed vsftpd and learned how to set up and secure your FTP server by following the instructions in this article. Now that you have access to a trustworthy and secure file transfer system, you may easily share files with others via your Ubuntu network.
Your vsftpd-powered FTP server is a useful addition to your Linux-based infrastructure, whether it is used for private purposes or in a professional setting. By this point, vsftpd should have been used to install an FTP server on Ubuntu. Now that your user lists and accounts have been set up, you should be able to login to your new FTP server. We also went into detail about the dangers of the FTP protocol and how to avoid them. Hope you got a clear idea for installing the FTP server Ubuntu.