Java-based web applications can be deployed and managed using Apache Tomcat. A potent web server and servlet container. This article will walk you through installing Tomcat 9 if you’re using Ubuntu 18.04. You can get Tomcat 9 up and running and designed to host your Java web applications by using the below inputs. The dedicated servers in the UK are optimized to manage organic traffic from London efficiently for your website visitors.
A lightweight, accessible, and open-source application server. For Java-based websites, it is called Apache Tomcat. Developers use it to create Java WebSocket and Java Expression Language. As well as Java Servlet and JavaServer Pages technologies. To successfully set up a reliable web server you’ll need to install Apache on AlmaLinux, ensuring your server is ready for action.
Requirements
- A distribution built on Ubuntu (like Ubuntu 18.04)
- An account that has sudo access
- A Ctrl–Alt–T terminal window
- By default, the apt package manager is included.
How to Install Tomcat on Ubuntu 9
To install the latest version of Apache Tomcat on Ubuntu, follow the instructions below.
Step 1: First, Make Sure Java is Installed.
Make sure you have the necessary Java installation for Ubuntu (OpenJDK) before downloading and installing Tomcat.
To check the Java version, open the terminal (Ctrl+Alt+T) and type the following command:
java -version
It will display the Java version that is currently installed on your machine. OpenJDK 11.0.3 is the most recent release as of right now.

Step 2: Install OpenJDK in the Below Step.
To install the latest release if you don’t have OpenJDK or your version is older than Java 8, type the following:
sudo apt install default-jdk
Step 3: Establish a Tomcat Group and User
Don’t run Tomcat as the root user for security concerns. To launch the Apache Tomcat service from the /opt/tomcat directory, create a new group and system user.
sudo groupadd tomcat
sudo useradd -s /bin/false -g tomcat -d /opt/tomcat tomcat

Step 4: Get Tomcat 9 Downloaded Here.
Download Apache Tomcat following the steps below:
1. Go to the official Apache Tomcat Download page and download the most recent version of the Tomcat binary.
2. Locate the tar.gz link and the Binary Distributions > Core list on it. Make a copy of the file’s link.
3. Return to the console and use the following command to switch to the /tmp directory:
cd /tmp
4. To download the package, use the curl command and the tar.gz link you copied in step 2 above.
curl -O https://dlcdn.apache.org/tomcat/tomcat-9/v9.0.56/bin/apache-tomcat-9.0.56.tar.gz

Step 5: Open the tar.gz file.
1. Use the following command to establish a new /opt/tomcat/ directory to extract the tar.gz Tomcat file:
sudo mkdir /opt/tomcat
2. Next, use the following command to extract the file into the new directory:
sudo tar xzvf apache-tomcat-9*tar.gz -C /opt/tomcat --strip-components=1
Step 6: Adjust User Permission for Tomcat
Although it lacks executable rights, the newly established Tomcat user must have access to the installation directory. Setting up execute privileges for the directory is necessary.
1. Proceed to the directory containing the Tomcat installation:
cd /opt/tomcat
2. Use the following command to give the Tomcat group and user ownership of the installation directory:
sudo chown -RH tomcat: /opt/tomcat
3. Finally, modify the permissions of the script in /opt/tomcat/bin/with to allow execution:
sudo sh -c 'chmod +x /opt/tomcat/bin/*.sh'
Step 7: Make a System Unit File Here.
You must construct a systemd service file since you will be using Tomcat as a service.
1. You must locate the JAVA_HOME location before you can configure the file. The Java installation package is located precisely here.
Asking the computer to provide you with details about the Java packages it has installed can allow you to accomplish this. Type this in the terminal:
sudo update-java-alternatives -l

There are two versions of Java accessible, as the output demonstrates. As a result, it also displays two trails showing where they are. Copy the location of the version you want to use. You can then proceed to create the service file.
2. Make a new file named tomcat.service and open it in the directory /etc/system/system:
sudo nano /etc/systemd/system/tomcat.service
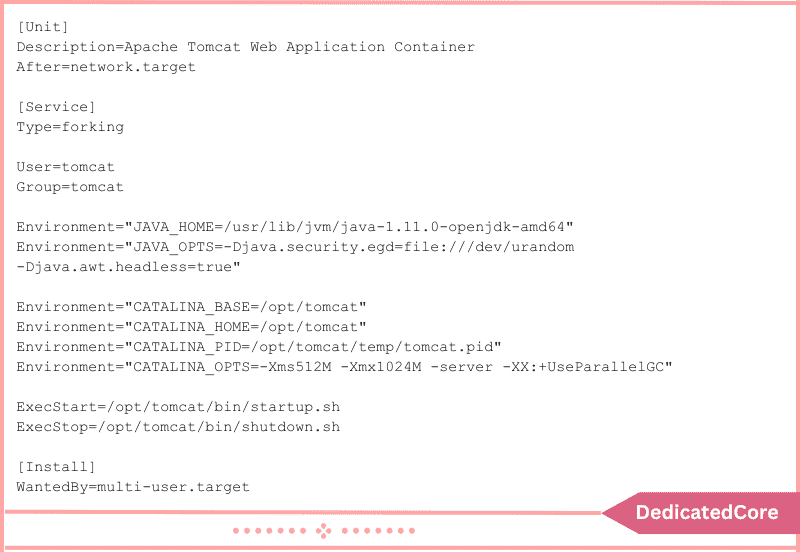
3. After the file has opened, copy and paste the following text, replacing the value for JAVA_HOME with the data you discovered in step 1.
[Unit]
Description=Apache Tomcat Web Application Container
After=network.target
[Service]
Type=forking
User=tomcat
Group=tomcat
Environment="JAVA_HOME=/usr/lib/jvm/java-1.11.0-openjdk-amd64"
Environment="JAVA_OPTS=-Djava.security.egd=file:///dev/urandom -Djava.awt.headless=true"
Environment="CATALINA_BASE=/opt/tomcat"
Environment="CATALINA_HOME=/opt/tomcat"
Environment="CATALINA_PID=/opt/tomcat/temp/tomcat.pid"
Environment="CATALINA_OPTS=-Xms512M -Xmx1024M -server -XX:+UseParallelGC"
ExecStart=/opt/tomcat/bin/startup.sh
ExecStop=/opt/tomcat/bin/shutdown.sh
[Install]
WantedBy=multi-user.target

4. Save the file and close it (Ctrl+X, y[es], Enter).
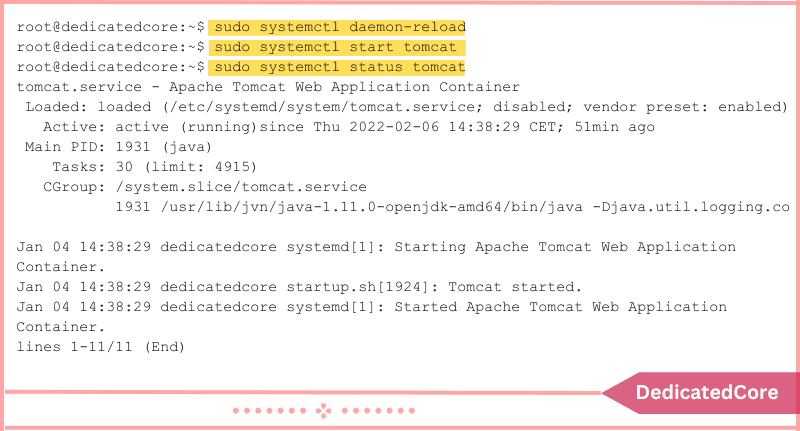
5. Use the following command to refresh the system daemon for the modifications to take effect:
sudo systemctl daemon-reload
6. At this point, you can launch the Tomcat service:
sudo systemctl start tomcat
7. Use the following command to confirm the Apache Tomcat service is active:
sudo systemctl status tomcat

You wish to be informed that the service is up and operating.
Step 8: Modify Firewall
You won’t be able to access the Tomcat interface if your server is being protected by a firewall, which is something you should do. Tomcat uses port 8080, which is open to networks outside of your own.
1. Use the command: to enable traffic through Port 8080.
sudo ufw allow 8080/tcp
2. The Apache Tomcat splash screen ought to be visible if the port is open. Enter the following Command in the In the browser window, enter the following:
http://server_ip:8080
or
http://localhost:8080
The web page should load in your browser as seen in the illustration below:
Step 9: Configure the Web Management Interface
You must create a user who has access to the online management interface after making sure the service is functioning properly.
Open the user’s file and make the necessary changes.
1. Use the command: to open the user file.
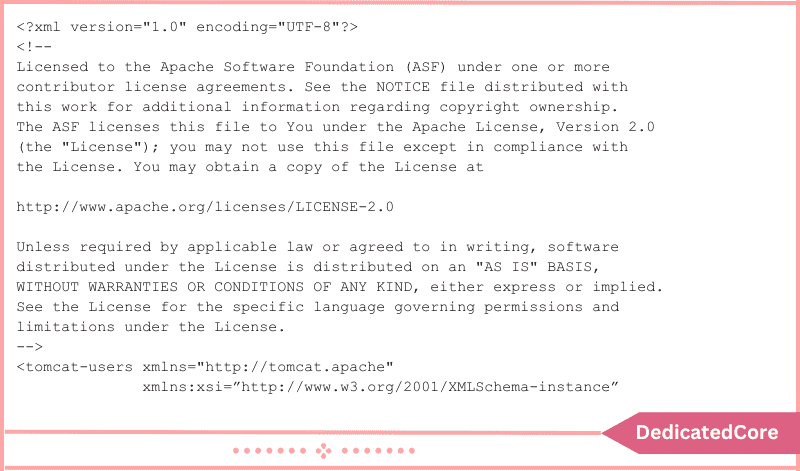
sudo nano /opt/tomcat/conf/tomcat-users.xml
The file should have the appearance shown in the illustration below:

2. Remove everything from the file and substitute:
<?xml version="1.0" encoding="UTF-8"?>
<tomcat-users>
<role rolename="manager-gui"/>
<role rolename="manager-script"/>
<role rolename="manager-jmx"/>
<role rolename="manager-status"/>
<role rolename="admin-gui"/>
<role rolename="admin-script"/>
<user username="admin" password="Your_Password" roles="manager-gui, manager-script, manager-jmx, manager-status, admin-gui, admin-script"/>
</tomcat-users>
Make sure to substitute your preferred strong password for the Your_Password value.
3. Save the file and close it.
Step 10: Configure Remote Access
The last step is to set up remote access. This is necessary. Tomcat can only be accessed by local computers by default.
1. Open the manager file first:
sudo nano /opt/tomcat/webapps/manager/META-INF/context.xml
2. Choose whether to allow access from a general IP address or b. a specific IP address.
a. Include the following lines in the file to make it open to the public:
<Context antiResourceLocking="false" privileged="true">
<!--
<Valve className="org.apache.catalina.valves.RemoteAddrValve"
allow="127\.\d+\.\d+.d+|::1|0000:1" />
-->
</Context>
b. To permit access from a particular IP address, include the IP address in the previous command as shown:
<Context antiResourceLocking="false" privileged="true">
<!--
<Valve className="org.apache.catalina.valves.RemoteAddrValve"
allow="127\.\d+\.\d+\.\d+|::1|0000:1|THE.IP.ADDRESS." />
-->
</Context>
3. Carry out step 3 again for the host-manager file.
To begin, run the following command to open the file:
sudo nano /opt/tomcat/latest/webapps/host-manager/META-INF/context.xml
4. Then, you may choose to allow access either from a general IP address (as in the previous step) or from a specific IP address.
Final Thought on Install Apache Tomcat 9 on Ubuntu 18.04
A big step towards starting a successful growing website with Australia’s vps server hosting which bundles various features. The necessary steps to install Apache Tomcat 9 on Ubuntu 18.04 have been covered in this guide. You are now prepared to deploy your Java web applications. Utilize Tomcat’s powerful features for web development. Server management after properly installing and configuring it.
Tomcat is a flexible tool that may simplify the deployment of web applications. Making it a crucial component of your development toolset. So investigate the options that Tomcat 9 on your Ubuntu 18.04 server provides. Also with the steps explained above you can download Tomcat 9.
Now that Tomcat is installed and operational on your Apache server. You can start deploying Java web applications.

