Setting up Anaconda on Ubuntu 18.04 is a simple operation that gives you access to a robust Python development and data science environment. Anaconda is a well-liked option for data scientists, academics, and developers since it offers a practical means of managing packages, environments, and dependencies. Our Forex VPS trading strategies involve expert tech support with server hosting that helps to solve any issues.
You may install Anaconda on your Ubuntu 18.04 machine by following these step-by-step instructions, allowing you to work on your Python projects without any difficulties. Anaconda is an open-source package management, environment manager, and distributor of the Python and R programming languages, tailored for use in data science and machine learning workflows. For better reliability, advanced features & SQL compliance on Ubuntu you should go with PostgreSQL.
Install Anaconda on an Ubuntu 18.04 Server
These private hosting plans are designed for Indians to excel satisfactory user experience with vps server in terms of usability and functionality. Coming back to the topic follow below steps:
Step 1: Obtaining the Most Recent Anaconda Version
With the following link, you can find the most recent version:

Locate the most recent Linux version, then copy the installer bash script link.
Step 2: Get the Anaconda Bash Script downloaded
Enter the /tmp directory after logging in as a sudo non-root user to your Ubuntu 18.04 server. Then, use curl to get the URL you copied from the Anaconda website:
$ cd /tmp
$ curl -O https://repo.anaconda.com/archive/Anaconda3-2021.05-Linux-x86_64.sh
Step 3: Using the Anaconda Script
Use the following command:
$ bash Anaconda3-2019.03-Linux-x86_64.sh
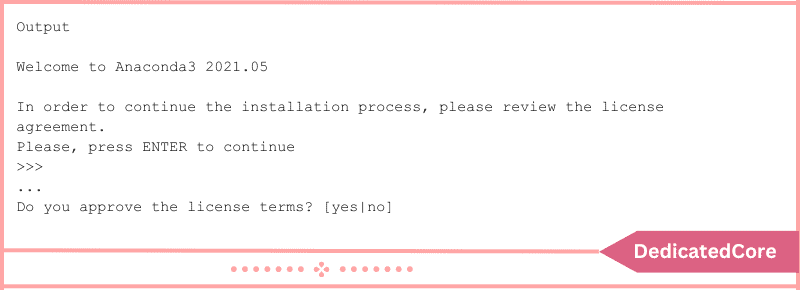
Pressing ENTER will take you to the end of the license agreement, where you can review it.

As long as you agree to the license, type yes when you reach the end of it and click Enter to finish the installation.
Step 4: Finishing the Installing Procedure
You will be asked to select the installation location after accepting the license. You can enter a new location or accept the default location by pressing ENTER.

The installation will now move forward. Keep in mind that installation takes some time.
Step 5: Choosing Your Options
Following installation, you’ll get the following output:

To utilize the conda command, it is advised that you type yes.
Step 6: Turning on the Installation
The installation can now be turned on by using the following command:
$ source ~/.bashrc
Step 7: Installing and Testing
To test the installation and activation, use the conda command:
$ conda list
All of the packages that are available to you through the Anaconda installation will be output to you.
Step 8: Creating Anaconda Environments in this Step.
The conda create command can be used to construct Anaconda environments. For instance, the following command can be used to build a Python 3 environment called my_env:
$ conda create --name my_env python=3
Turn on the new setting in this manner:
$ conda activate my_env
You are now prepared to start working on a project because your command prompt prefix has changed to indicate that you are in an active Anaconda environment.
Final Words on Install Anaconda on Ubuntu 18.04 | 22.04
In conclusion, anyone wishing to use Python’s capabilities for data science, machine learning, and scientific computing must first install Anaconda on Ubuntu 18.04. With Anaconda, you can effortlessly manage your environments and dependencies and get access to a large library of pre-built packages and tools.
You may guarantee a seamless installation process and start utilizing Anaconda to speed up your development workflows by following the instructions provided in this guide. Regardless of your level of experience as a data scientist, Anaconda on Ubuntu 18.04 gives you the resources you need to be successful in your Python projects.

