One common option for hosting websites and controlling online traffic is Nginx. A potent and adaptable web server. Anyone wishing to set up a web server or reverse proxy on Ubuntu 20.04 must know how to install and configure Nginx. Here you will understand installing and configuring Nginx on your Ubuntu server. In this article, your web services are safe and operational. With the help of updating or upgrading the Linux kernel which brings stability to your system.
A free, open-source Linux program for web servers is called Nginx. By sending web traffic to particular servers, it functions as a reverse proxy server. In addition to being used for load balancing and security, Nginx may run on its own as a web server.
Requirements
- A machine running Linux Ubuntu 20.04
- An account that has root or sudo privileges
- The ability to open a command line or terminal window (click Activities > Search > type Terminal)
Install Nginx on Ubuntu 20.04 | 22.04
Step 1: Software Repositories Updated
Refreshing the repository lists is crucial before adding new software. By doing this, you may ensure that the most recent patches and updates are applied.
Enter the Following into an Open Terminal Window:
sudo apt-get update
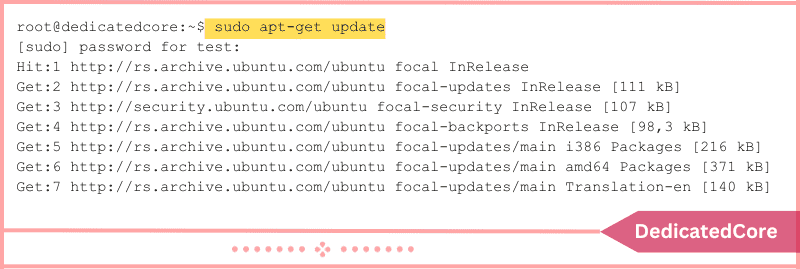
Let the process come to an end.
Step 2: Utilizing Ubuntu Repositories, Install Nginx
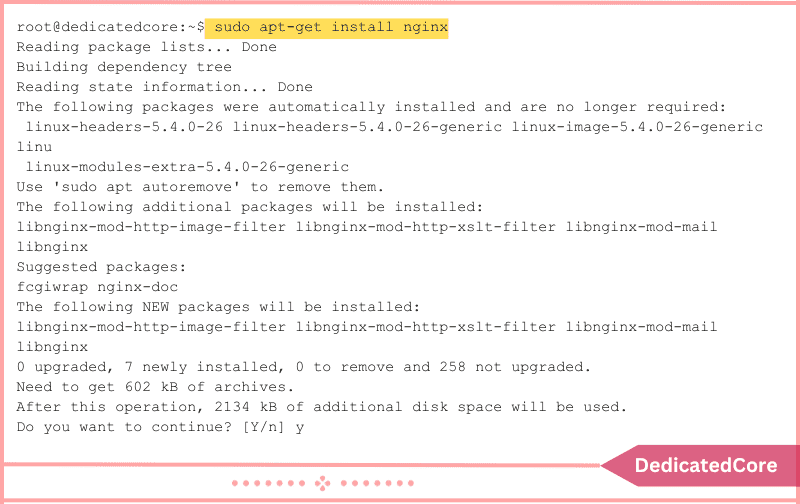
The default repositories for Ubuntu 20.04 contain Nginx. Enter the following command to install it:
sudo apt-get install nginx
Step 3: Check about the Installation
Verify the program version to make sure Nginx is installed correctly. Add these to the entry:
nginx -v
The Nginx software version ought to be visible on the system.

Step 4: Nginx Service Control
Nginx’s behavior is modifiable. Use this to enable or disable Nginx at boot, as well as to start or stop it.
To begin with, see how the Nginx service is doing:
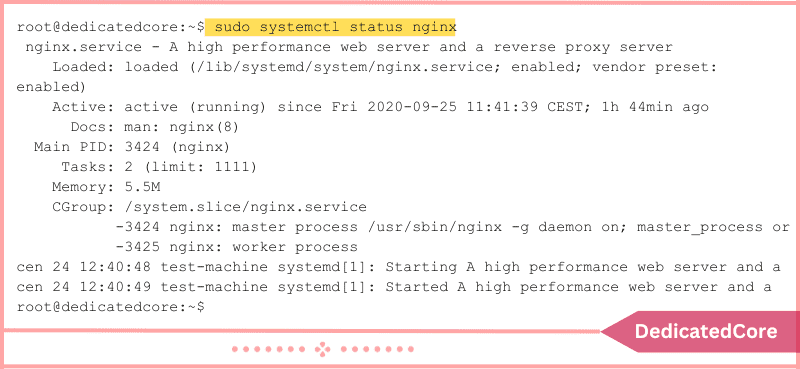
sudo systemctl status nginx
If Nginx is shown as active (running), it has already been launched. To close the status display, press CTRL+z.
To start the Nginx service if it’s not already operating, use the following command:
sudo systemctl start nginx
Enter this to configure Nginx to load at system startup:
sudo systemctl enable nginx

Enter the following to terminate the Nginx service:
sudo systemctl stop nginx
To Stop Nginx from Loading Upon System Startup:
sudo systemctl disable nginx

The Nginx service can be reloaded to implement configuration changes.
sudo systemctl reload nginx
For a Forceful Nginx Restart:
sudo systemctl restart nginx
Step 5: Permit Traffic from Nginx
Nginx requires access via the firewall of the system. To achieve this, a set of profiles for the Ubuntu default ufw (Uncomplicated Firewall) are installed by Nginx.
To begin, list the available Nginx profiles here:
sudo ufw app list
Displays as Below:

Enter the following to allow Nginx to pass through the Ubuntu firewall by default:
sudo ufw allow 'nginx http'
Rules should be updated on the system.

Enter the following to update the firewall settings:
sudo ufw reload

Enter this for encrypted (HTTPS) traffic:
sudo ufw allow 'nginx https'
To enable both, type in:
sudo ufw allow 'nginx full'
Step 6: Run Nginx Tests
As in Step 4, confirm that the Nginx service is up and operating. Launch a browser, then go to the following website:
http://127.0.0.1
The Nginx welcome page should be displayed by the system.
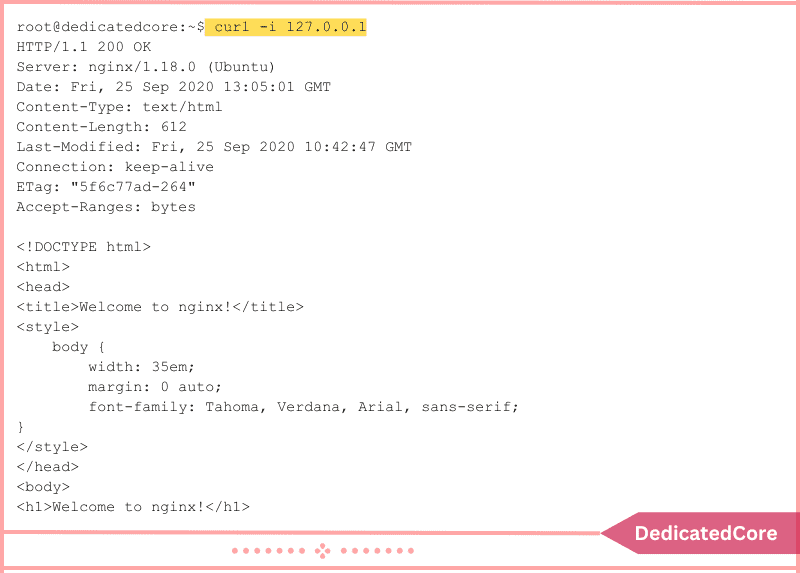
Curl can be used to load the Nginx Welcome page in the terminal if the system lacks a graphical user interface:
sudo apt-get install curl
curl –i 127.0.0.1
The Nginx Welcome page’s HTML code ought to be shown by the system.
Step 7: Server Block Configuration (Optional)
A server block in Nginx is a configuration that functions independently of other servers. Nginx is preconfigured with one server block.
You can find it at /var/www/html. It can, however, be set up with several server blocks for various websites.
1. Establish the Test Domain’s Directory
Enter the following to create a new directory in a terminal window:
sudo mkdir -p /var/www/test_domain.com/html
2. Set Up Permissions and Ownership
To set up ownership and permission rules, use chmod:
sudo chown –R $USER:$USER /var/www/test_domain.com
sudo chmod –R 755 /var/www/test_domain.com
3. Make Sure the Server Block’s index.html File Exists.
Open index.html in your preferred text editor (Nano will be used), and modify it there:
sudo nano /var/www/test_domain.com/html/index.html
Enter the HTML code below in the text editor:
<html>
<head>
<title>Welcome to test_domain.com!</title>
</head>
<body>
<h1>This message confirms that your Nginx server block is working. Great work!</h1>
</body>
</html>
To save the changes, use CTRL+o. To stop, press CTRL+x.
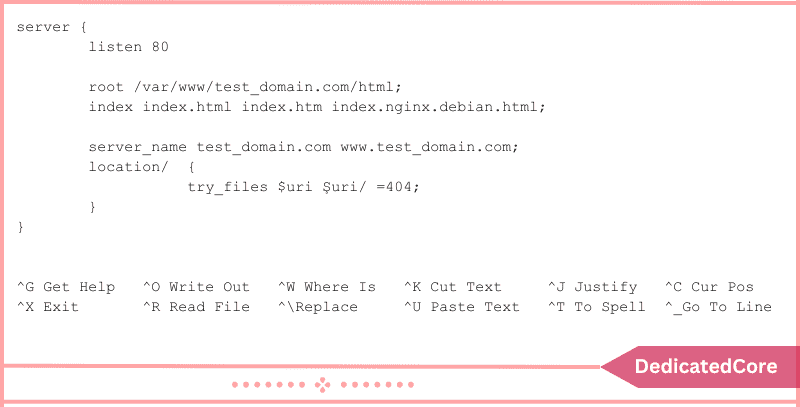
4. Produce the Block Configuration for the Nginx Server.
To edit, open the configuration file:
sudo nano /etc/nginx/sites-available/test_domain.com
Put in the subsequent code:
server {
listen 80;

root /var/www/test_domain.com/html;
index index.html index.htm index.nginx.debian.html;

server_name test_domain.com www.test_domain.com;
location / {
try_files $uri $uri/ =404;
}
}
5. Make a Symbolic Connection that Nginx will Read Upon Startup.
Enter the following to establish a symbolic link between the startup directory and the server block:
sudo ln –s /etc/nginx/sites-available/test_domain.com /etc/nginx/sites-enabled
6. Turn the Nginx Service Back On.
Use these instructions to restart Nginx:
sudo systemctl restart nginx
7. Examine the Configuration.
sudo nginx –t
The configuration file test should be successful, and the system should indicate that the configuration file syntax is correct.

8. Make Optional Changes to the Host File.
The file /etc/hosts need to be changed to show test_domain.com If you’re utilizing a test domain name that isn’t registered or public
Use this command to see the IP address of the system:
hostname –i
Note the IP address that appears.

Next, open /etc/hosts for editing:
sudo nano /etc/hosts
Add the following line to the blank space directly below the localhost information:
127.0.1.1 test_domain.com www.test_domain.com
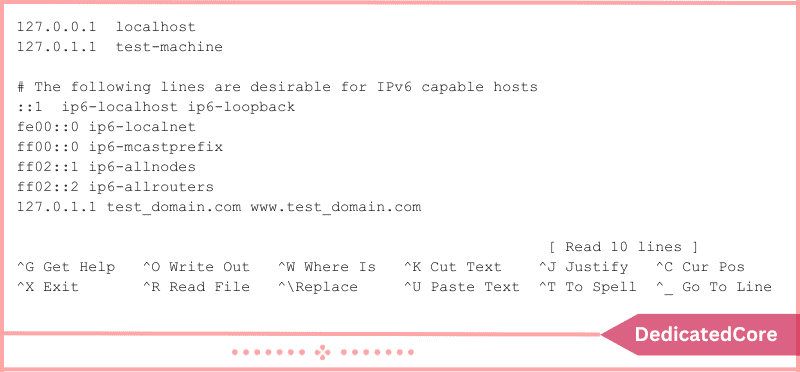
Instead of 127.0.0.1, enter the IP address that is shown above. To save the changes, use CTRL+o. To exit, press CTRL+x.
9. Look up test_domain.com Using a Browser.
Launch a web browser and enter test_domain.com or the domain name you specified in Nginx.
Final Thoughts on How to Install and Configure Nginx on Ubuntu
On your Ubuntu 20.04 server, you’ve made significant progress toward hosting websites. Controlling web applications, and maximizing online traffic now that Nginx has been installed and configured. Nginx is a great option for a range of web-serving activities because of its speed, scalability, and feature-rich set.
You’ll be well-prepared to provide your users with dependable and quick online services. As you continue to experiment with and optimize your Nginx configuration. At this point, your Ubuntu 20.04 installation of Nginx ought to be operational. You should now have an overview of configuring a Nginx server block as a bonus.

