Git stashing is a useful tool that enables developers to save work-in-progress. Also modifications without committing them permanently. But eventually, those hidden alterations become outmoded or are no longer required. You’ll then need to understand how to drop a Git stash or say Clear a Git Stash. This tutorial will walk you through the process of effectively deleting a Git stash. Allowing you to maintain a tidy and well-organized version control history. Configuring a username and email in Git helps track a contribution to a project to identify the author of the changes, Git commits with every username and email.
Git stash enables developers to lay aside their uncommitted files and unfinished work. Focus on something else that needs their immediate attention. And once done then go back to the unfinished work. The stashes are kept by Git locally in a unique ref until they are destroyed or restored. If you elect to retain too many stashes, the ref may get disorganized. In which case you will need to manually clean it.
What is a Git Stash Drop?
Work from the stockpile can be restored in one of two ways:
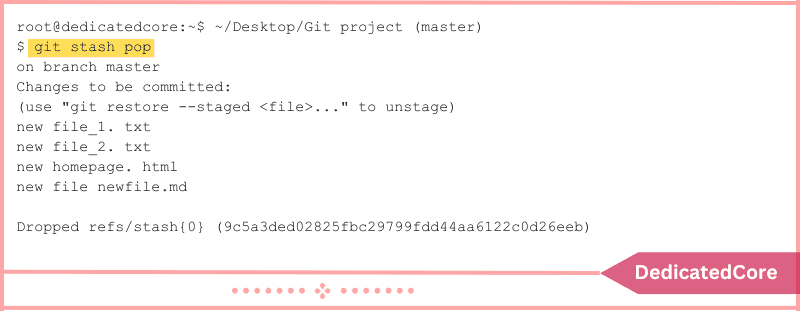
- Using git stash pop, you can schedule the destruction of the stash and restore the changes.
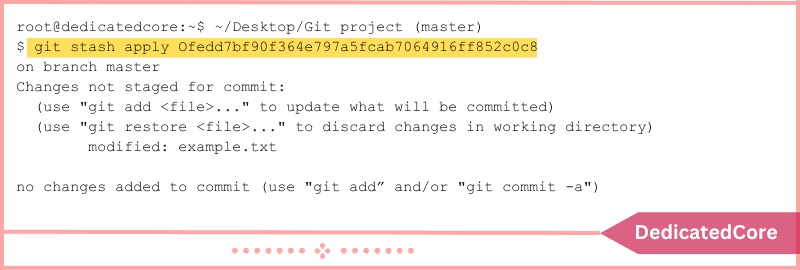
- When using the git stash apply command, the changes are restored but the stash is left in the ref.
The git stash applied may screw with the ref if it is used too frequently since it stores too many stashes, which must be manually erased when they are no longer required.
Steps For Deleting Git Stash
The sections below demonstrate various approaches to removing a Git stash.
Step 1. Remove the Newest Stash
Run the following command to remove the most recent Git stash:
git stash drop

The most recent stash is deleted by the command. However, there is no prompt or warning before deleting the stash, so make sure you want to do it before executing the command.
Step 2. Drop a Particular Stash in Git
While prior stashes are referred to by the reflog of the refs/stash reference, Git stores the most recent Git stash in refs/stash. The syntax for reflog is:
stash@{n}
The stash index is denoted by “n.” Stash@0 refers to the most current stash, followed by Stash@1, etc. Run the following command to get a stash list and determine which index you must specify before you may delete a specific stash:
git stash list

A list of all stashes together with their corresponding indexes may be found in the output. The syntax to delete a given stash is as follows:
git stash drop stash@{n}
Enter the index number of the stash you want to remove for {n}. stash@{3} to remove this, for instance. Run the following Command:
git stash drop stash@{3}

The command updates the indexes of every stash in the stack while deleting the given stash.
Step 3. Eliminate all Git Stash
Run the following command after you’re done with a project and want to remove all the stashes from the ref:
git stash clear
Without asking for approval or issuing a warning, the command deletes all of the stashes.
Recover Deleted Stash
As previously mentioned, there is no confirmation dialog or alert when deleting a Git stash. There is still a way to recover a deleted stash if you change your mind. But you’ll need the commit hash of the deleted stash.
To restore a deleted stash, follow these steps:
Step 1. Obtain the Commit Hash for Stash
The output message includes the hash value of the stash commit if you used git stash pop to restore the stash:

Run the following command to search for the stash commit hash in the repository browser if you manually destroyed a stash:
gitk --all $( git fsck --no-reflog | awk '/dangling commit/ {print $3}' )
The command launches a repository browser that displays every commit that has ever been made in the repository, both reachable and unreachable:
If you have supplied a commit message, look for it to discover the stash commit. If you didn’t include a message while stashing, “WIP on…” will be the first line of any messages that are applied. The SHA1 ID box’s SHA value should be copied.
Step 2: Restoration of Deleted Stash
Use the following syntax to restore the stash after locating the lost stash commit hash:
git stash apply [stash_hash]

The stashed modifications are applied by the command. Alternately, use the following syntax to apply the stashed modifications to a new branch:
git branch [branch_name] [stash_hash]
Enter the name of the new branch as [branch_name]. As an illustration, we added a new branch called recovered-stash and switched to it:

Final Wording on Deleting Git Stash and Recovering Stash
Dropping a Git stash may seem like a simple task. But it’s crucial to running an effective and well-organized version control system. Hope you learned how to organize your stash list and make sure that your repository history is brief. It is meaningful to follow the easy steps given in this article. Learn how to efficiently list and manage remote branches in Git to ensure your codebase stays synchronized and organized across collaborative projects.
Therefore, keep these methods in mind the next time you have unneeded changes stored away to simplify your Git workflow. We definitely would be glad if this would have helped you in knowing about How to Drop a Git Stash or Git Stash Delete.
Frequently Asked Questions (FAQ)
1. What is Git stash?
This helps you to not lose your work while switching to other branches. The git stash also helps to save the changes in the working directory.
2. How do I delete a Git stash?
git stash drop stash@{<index>}
With the help of the above command, you can delete a specific stash.

