This tutorial will help you install and set up Ghost, an open-source blogging platform that is strong and stylish, step-by-step. This article will simplify the installation and configuration procedure, regardless of your level of experience as a developer, so you can concentrate on producing and disseminating your content without any difficulties. To experience less page loading time, a quicker experience, and also use as a reverse proxy you need to install Nginx.
Traders focusing on improving their market performance by utilizing advanced virtual private server in New York can offer unmatched consistency and speed. Coming back, Ghost is an open-source, lightweight blogging software. Ghost has a large selection of themes and is completely customizable. Using the official ghost-cli installation procedure, you’ll setup a production-ready Ghost instance on Ubuntu 16.04 in this article.
This will install Ghost, set up Nginx to forward requests to Ghost, encrypt it using a Let’s Encrypt certificate, and set up Ghost to operate as a system service in the background. Businesses seeking the virtual server, and exploring cost-effective hosting options in Singapore can greatly decrease execution time and accessibility in a competitive market.
Required Conditions
To finish this tutorial, you’ll need:
- One 1GB Ubuntu 16.04 server with a firewall and a sudo non-root user installed was set up using the Ubuntu 16.04 initial server setup tutorial.
- The official PPA can be used to install Node.js, as detailed in How to Install Node.js on Ubuntu 16.04.
- Your server has Nginx installed, as demonstrated in How to Install Nginx on Ubuntu 16.04.
- MySQL is installed as follows: Ubuntu 16.04: How to Install MySQL?
- A domain name set up to point to your server is optional. A domain name set up to point to your server is optional.
Install and Configure Ghost on Ubuntu 22.04
Step 1: Installing the Ghost CLI program First.
We’ll use the official ghost-cli application to install Ghost. Installing Ghost, setting up Nginx as a reverse proxy, creating the MySQL user and database, and securing the website with SSL/TLS encryption are all done by this application.
Using npm, first download ghost-cli:
$ sudo npm i -g ghost-cli
The recommended installation location for Ghost is the var/www/ghost directory, which is where we’ll put it. Make this directory available:
$ mkdir /var/www/ghost
Next, confirm that this directory is owned by your user.
$ sudo chown $USER:$USER /var/www/ghost
The following command will set the permissions such that the /var/www/ghost directory has read and execute permissions for all users as well as full permissions for you.

We can set up our blog once the directory is created and the CLI is installed.
Step 2: Setting Up and Installing Ghost
An installation tutorial included in the Ghost CLI program will guide you through every step of setting up a functional Ghost blog.
Navigate to the directory /var/www/ghost/.
$ cd /var/www/ghost/
After that, install Ghost by using the ghost command. Ghost will be set up with MySQL as the default database. Although alternative databases can be utilized, MySQL is the suggested option for production configurations.
$ ghost install
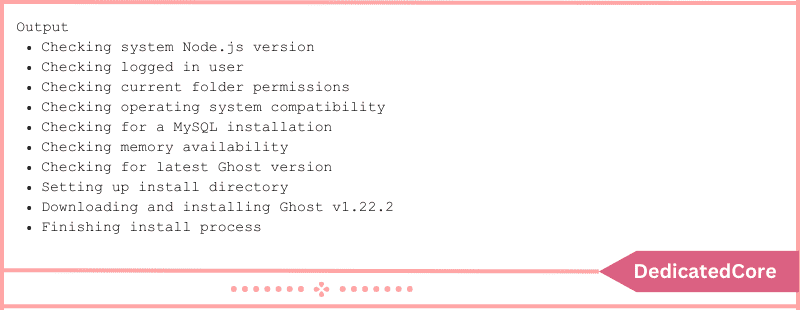
After making sure you have installed all required dependencies, the installer will download and install Ghost:

You will be prompted for your blog URL and MySQL database details after the installation is finished. In this step, enter the root username and password. You can use ghost_prod as the default database name.

After that, the configuration wizard will create a ghost system user and prompt you to approve the creation of a ghost MySQL user.

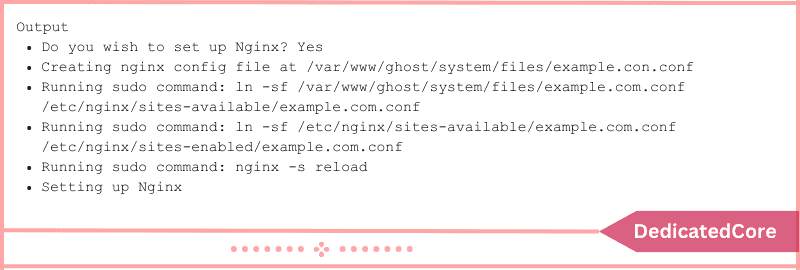
It will then ask you if you want to set up Nginx. Verify this, and the installer will build your blog’s suitable reverse-proxy server block:

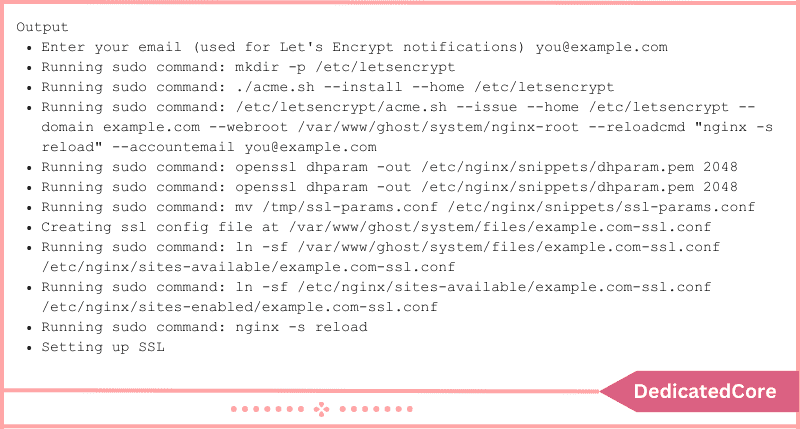
You’ll then be asked to enable SSL support. Press Y to proceed if you are using a fully qualified domain name that is registered and if your DNS settings are set up to point to the IP address of your server.

Once your email address has been verified, the certificate will be installed.

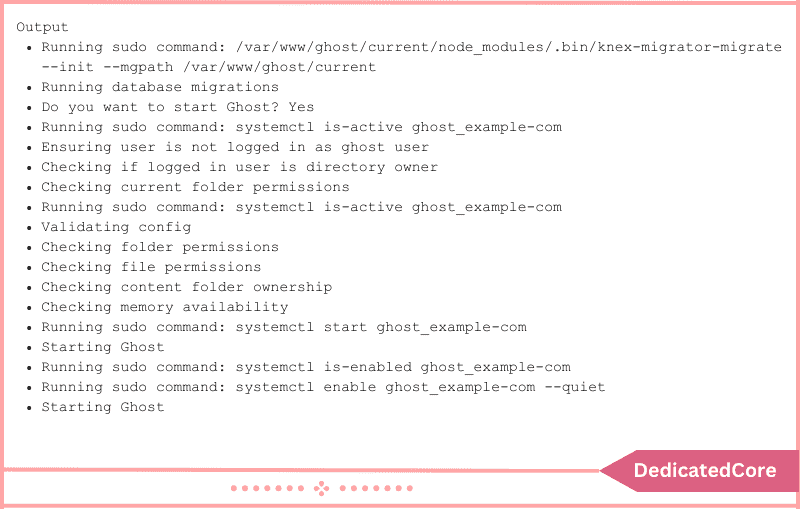
After that, you will be prompted to set up a systemd service by the configuration wizard. The wizard will generate a new systemd service called ghost_example-com and set it up to launch at boot if you press Y to proceed:

When the wizard has finished configuring your database, it will ask if you want to start Ghost. Click Y to confirm.

You can now utilize your installed Ghost blog. Your blog can be accessed at http://example.com. Let’s now create an account so you may publish your very first article.
Step 3: Set up your blog and create an account
- Go to http://example.com/login to set up your blog and log in.
- Click “Create your account” to get started. The “Create your account” screen will appear, asking for your name, email address, password, and blog title:
- Enter the information and select the final step: Click the “Invite your team” button.
You can use the I’ll do this later link located at the bottom of the screen instead of answering the wizard’s request for the email addresses of other collaborators. After that, a list of posts that Ghost refers to as stories will appear.
You may change other blog settings and create new stories using the menu on the left. For further information, see the official documentation.
Summarizing with Installing and Configuring Ghost on Ubuntu 22.04
Throughout this article, you installed Ghost, set up Nginx to forward requests to Ghost through a proxy, and made sure Ghost is operating as a system service. Still, there’s a ton more you can do with Ghost. On your Ubuntu 16.04 server, you have successfully installed and configured Ghost. You’ve started the process of creating your blogging platform by using this guide. For software development or running jar applications, one needs to install Java on Ubuntu.
Now that Ghost has a user-friendly interface and a wealth of options, you can let your ideas run wild and share them with the world. Whether you’re in charge of a business website or a personal blog, Ghost provides the performance and flexibility you want to be successful.

