Managing your Ubuntu server can be made much simpler by installing Webmin, which is a simple process. With an easy-to-use graphical interface, Webmin is a web-based control panel that lets you manage many parts of your server. Regardless of your experience with system administration, this tutorial will help you install Webmin on your Ubuntu system step-by-step so you can easily administer your server. The vps hosting from India serves their service to entire Asian subcontinent with reliable and scalable solutions.
Administrators may administer Linux and Unix servers and systems with Webmin, a web-based utility. You may monitor system logs and emails, update and configure your system, manage user accounts, and carry out other administrative duties using the Webmin interface. The leading vps hosting placed in German region acquired specific hardware like additional NVME storage and advanced security features.
Essential Necessities
If you want to improve the performance of the applications on your system on PHP make sure it’s updated to the latest version.
- A machine running Ubuntu 18.04 or Ubuntu 20.04
- An account that has sudo access
- Getting inside the terminal window
- A functional network link
Step-by-Step Guide for Installing Webmin on Ubuntu 20.04
To install Webmin on Ubuntu, follow the instructions below. Both Ubuntu 18.04 (Bionic Beaver) and Ubuntu 20.04 (Focal Fossa) can be used with these steps.
Step 1: First, Update the Package List for Ubuntu.
1. To update the package list, type the following command into the terminal:
sudo apt update
2. Type in your administrator password and hit Enter when prompted.
3. Use these to install the update packages:
sudo apt upgrade
4. To validate the change, type Y and hit Enter.

5. Use the following methods to install dependency packages so you can manage software repositories:
sudo apt install software-properties-common apt-transport-https
6. When prompted to confirm the installation, type Y and hit Enter.
Step 2: Turn on Webmin Repository.
1. Include Webmin’s GPG key by using:
sudo wget -q http://www.webmin.com/jcameron-key.asc -O- | sudo apt-key add -

2. Add the Webmin repository by hand utilizing:
sudo add-apt-repository "deb [arch=amd64] http://download.webmin.com/download/repository sarge contrib"

Step 3: Install Webmin on Ubuntu Now.
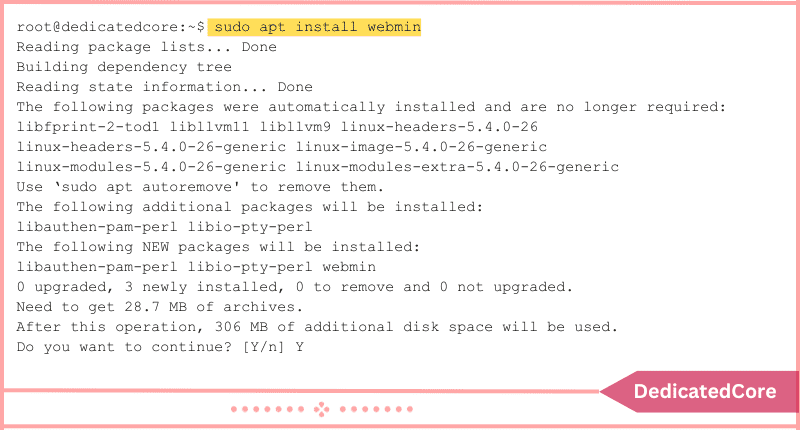
1. Use these to launch the Webmin installation:
sudo apt install webmin
2. To confirm the installation, type Y and hit Enter when prompted.

3. After the installation is finished, see how the Webmin service is doing:
sudo systemctl status webmin

Verifying the installed version of Webmin is another way to make sure the installation went well:
dpkg -l | grep webmin

Step 4: Configure the Firewall with the following Command
1. By default, Webmin uses TCP port 10000. Using your firewall, open this port by using:
sudo ufw allow 10000/tcp

2. Reload your firewall so that the modifications are applied:
sudo ufw reload

3. Verify the modifications by checking your firewall’s status:
sudo ufw status

Step 5: Use Ubuntu to Access Webmin in Final Step
1. Enter the following as the Webmin root user’s password:
sudo /usr/share/webmin/changepass.pl /etc/webmin root [new password]
2. Launch your web browser and type the following, use the IP address of your server, as the web URL:
https://[your server's IP]:10000/
The IP address of a local or remote server may be used.
3. The first time you attempt to log in, Webmin generates its own SSL certificate that the browser is unable to recognize, resulting in a page alerting you to a possible security concern.
4. Enter your password and log in with the root username, which is the default.

5. To examine the facts about your system, use the Webmin dashboard.

Final Words on Installing Webmin on Ubuntu
In summary, setting up Webmin on your Ubuntu server gives you an easy-to-use interface for system administration, so even people with different degrees of technical knowledge may utilize it. Managing software packages, setting up user accounts, and keeping an eye on system performance has become easier and more effective using Webmin. As one is not ready to install each package individually you can get the help of Anaconda and so know how to install it on Ubuntu.
By completing the easy steps in this article, you’ve given yourself a strong tool that improves the way your Ubuntu server is managed overall, making administrative duties more efficient and helping the system run more smoothly. You now understand how to set up Webmin on Ubuntu 18.04 or 20.04. You ought to have a fully functional copy of Webmin installed and operational after completing this guide.

