The abbreviation Zsh stands for Z Shell, a robust and customizable command-line shell. That provides several features and enhancements over Bash by default. Zsh can be an excellent option if you’re an Ubuntu user. If you are trying to improve your command-line experience. This article will lead you through the process of installing Zsh on an Ubuntu system. Enabling you to fully utilize its capabilities and boost your command-line productivity.
An interactive Unix shell called the Z Shell (Zsh) can be used as a command interpreter for shell scripting. It is an improved version of the Bourne shell that includes some Bash, ksh, and tcsh functionality. Learn how to effortlessly manage your Ubuntu server with our thorough manual on installing Webmin, making administrative tasks simpler and more efficient.
Command-line completion, shared histories, enhanced globbing, intelligent tab completion, and spelling correction. A wide range of plugins and themes are just a few advantages that Zsh has to offer. In this article, you will discover what is zsh and how to set up and install the Z Shell on Ubuntu.
Requirements
- An Ubuntu-running computer.
- A user account with root rights.
- Use the terminal by pressing Ctrl + Alt + T.
Install Zsh on Ubuntu 20.04 | 22.04
Bash is the default shell for Ubuntu. To install and utilize Z Shell on Ubuntu, follow these steps:
Step 1: Update the System Repository First.
To receive the most recent software version available, update the system package repository. Run the following command after opening the terminal:
sudo apt update
When prompted, enter the administrator password and hit Enter. Hold off till the procedure is over.
By updating the package repository, you can make sure that your system has the most recent knowledge of software packages and their dependencies when installing new software.
Step 2: Install Zsh after the System Repository is Updated
For Ubuntu, enter the following command to install Z Shell:
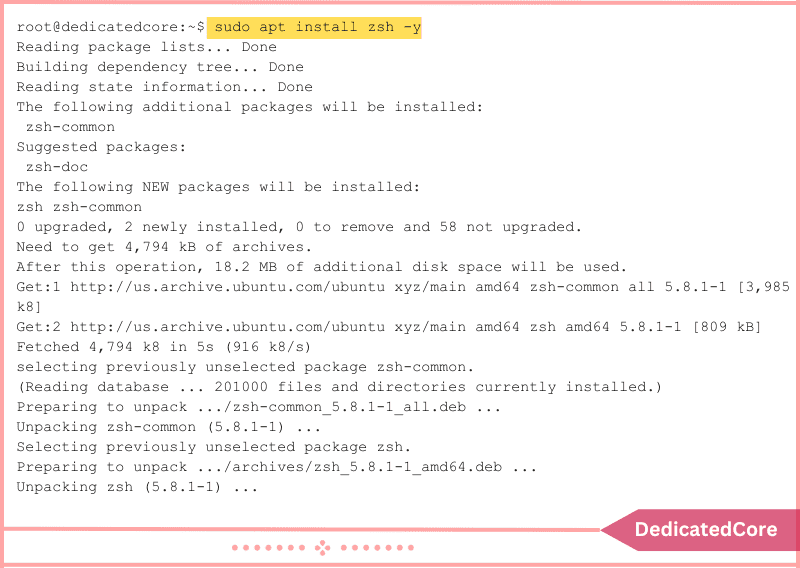
sudo apt install zsh -y
When prompted during installation, the -y flag automatically responds “yes” and gives permission to install Zsh and any dependencies it needs. If you wish to inspect the installation, leave out the flag.
Step 3: Verify Installation
Check the application version to see if the installation was successful after it is complete. Run the command line:
zsh --version

The system’s most recent version is displayed in the output.
Ubuntu Zsh Configuration
You may customize the shell environment, increase efficiency with intelligent tab completion, and take advantage of the adaptability of Zsh scripting features by configuring Zsh in Ubuntu.
In this section, you will learn how to set up Zsh as your default shell in Ubuntu and be given an overview of your customization options.
Introductory Configuration
Zsh needs initial configuration when it is started for the first time, unlike Bash and other shells. Enter the shell name into the terminal to launch Zsh:
zsh
The configuration choices that Zsh presents upon initial starting are seen in the following screenshot:
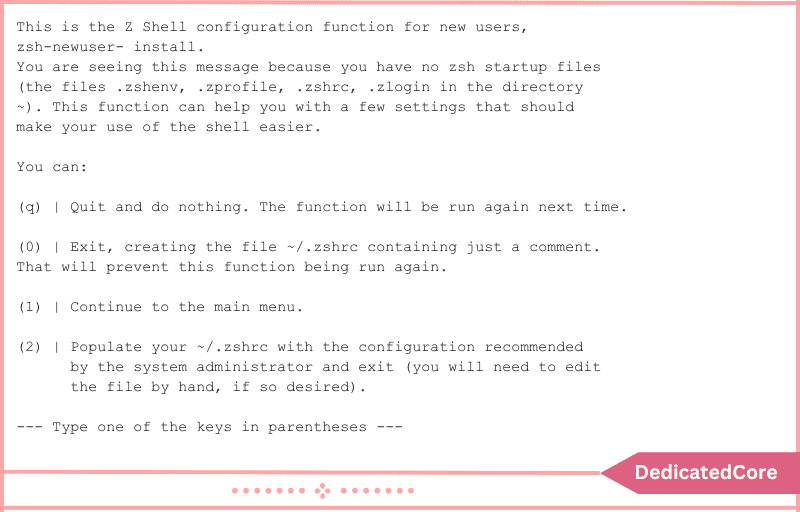
- To access the main menu and customize each setting individually, Press 1.
- Add the default settings to the configuration file (.zshrc), which you may then edit by hand by Pressing 2.
- To start from scratch and create an empty .zshrc configuration file, press 0.
- To end the setup and restart it the following time you enter Zsh, press q.
The changes are saved when you finish the setup, and the Z Shell prompt then displays. The first configuration only appears the first time you run the shell, but with the zsh-newuser-install command, you can execute the initial setup again.
Default to Zsh as the Shell
Zsh is not setup or set as the default shell after installation. To make Zsh your default shell, take the following actions:
1. Verify which system shell is the default one:
echo $SHELL

The result displays the default shell, which is the value of the $SHELL variable.
2. To alter the default login shell, use the chsh (change shell) command. With chsh, you can alter the default shell using the following syntax:
chsh -s [path] [user]
- The path to the shell you want to use is specified by [path].
- The user for which you want to modify the default shell is specified by [user].
- The default shell for the current user is altered if the user is not specified.
Use the which command to specify the Zsh path automatically if you are unsure of the shell path. For instance:
chsh -s $(which zsh)
When prompted, enter the root password and hit Enter.

The command switches the current user’s default shell to Zsh. Log out of the terminal and then back in to use the Z Shell.
Install Oh My Zsh
Oh My Zsh is an open-source framework that enhances the Z Shell’s capabilities and functionality. The command-line experience will be improved, making it more fun and effective. Oh My Zsh offers a selection of installed. Also maintained themes, plugins, and scripts.
By Running the below command to Install Oh my Zsh:
sh -c "$(wget https://raw.github.com/ohmyzsh/ohmyzsh/master/tools/install.sh -O -)"
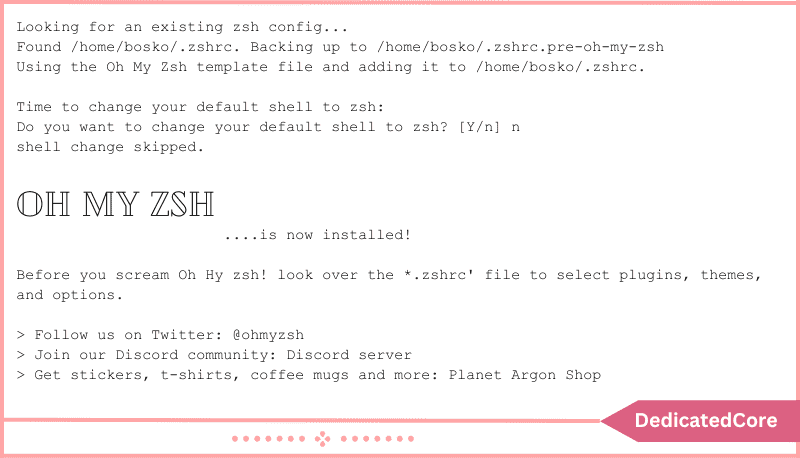
You are prompted by the installer to make Zsh your default shell after the installation is complete. If you wish Zsh to be the default shell, type y; otherwise, type n to keep the current one. After installing the framework, you may begin modifying your prompt.
Add Your Theme
There are more than 150 terminal themes accessible once Oh My Zsh has been installed. On the Oh My Zsh GitHub theme page, you can view the names and visual representations of each theme. Following the instructions below, you can add the theme you’ve chosen to your terminal once you’ve done that:
1. Open a text editor and make changes to the .zshrc configuration file. We’ll utilize nano as an illustration.
nano ~/.zshrc
2. Find the line that reads:
ZSH_THEME="robbyrussell"
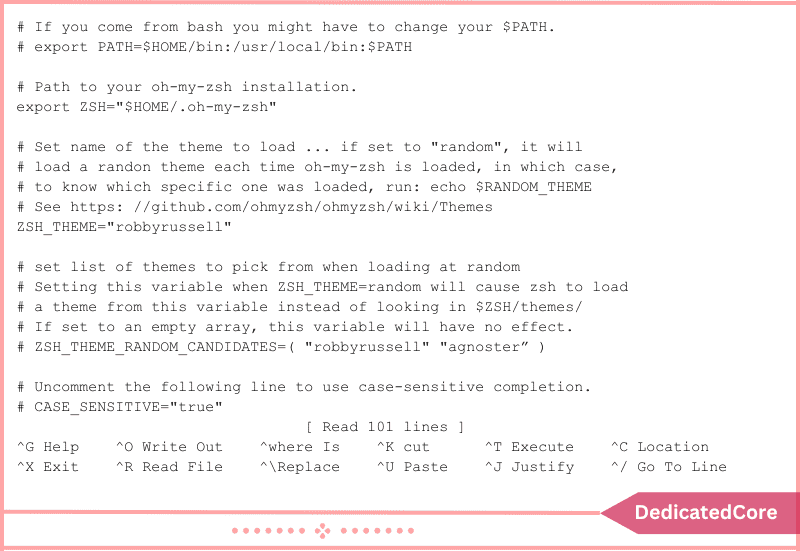
The line specifies the terminal’s current theme. Robby Russell is the default. Change the value to correspond with the desired theme’s name to use a different one. For instance:
ZSH_THEME="jonathan"
3. To load the theme, save the file and restart the terminal:

The desired theme is now applied to the terminal.
Auto-Suggestions Enabled
To receive command suggestions based on your previous Zsh commands, enable the auto-suggestions plugin. Getting auto-suggestions helps you do your everyday duties faster and saves time because we use some commands frequently.
To enable auto-suggestions, take the following actions:
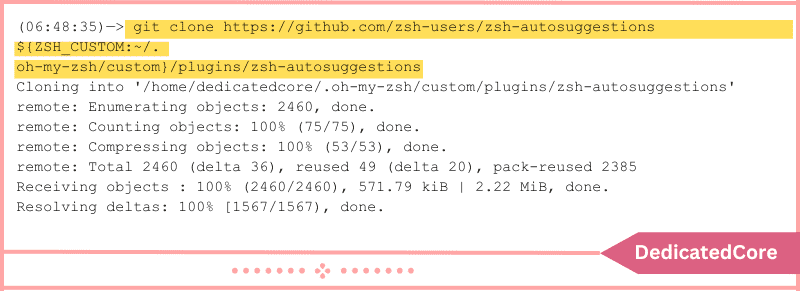
1. Add the plugin repository for auto-suggestions first. To clone the repository, execute the following command:
git https://github.com/zsh-users/zsh-autosuggestions ${ZSH_CUSTOM:-~/.oh-my-zsh/custom}/plugins/zsh-autosuggestions
2. Using a text editor, open the .zshrc configuration file:
nano ~/.zshrc
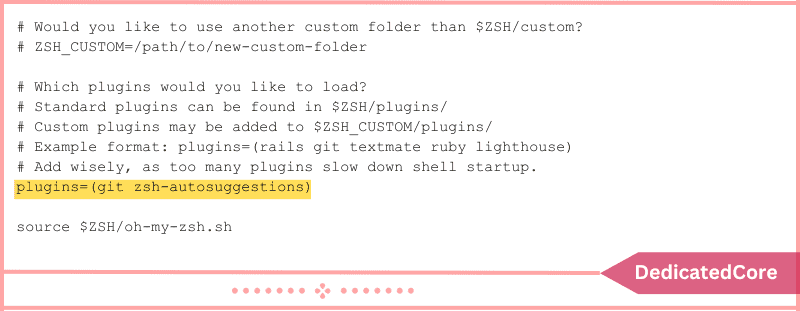
3. Add the auto-suggestion plugin to the plugins section of the file by scrolling down and doing as follows:
plugins=(git zsh-autosuggestions)
4. Save your changes and close the editor.
5. To enable the auto-suggestions plugin, restart Zsh and the terminal.
Use the right arrow key to accept the recommendation and have the command finished for you as you type:

Set Syntax Highlighting On/Enable
Numerous advantages come from syntax highlighting, such as increased readability of the code, mistake detection, language recognition, productivity, and aesthetics.
To add syntax highlighting to Zsh, take the following actions:
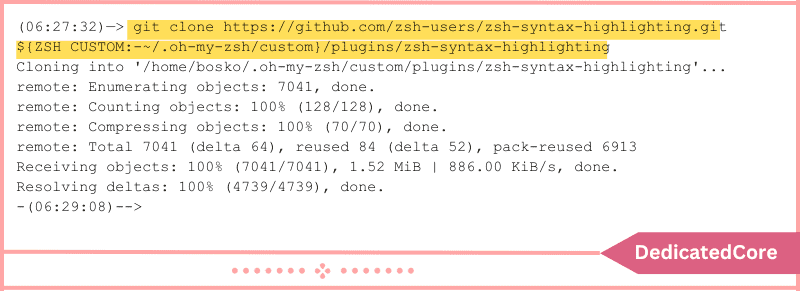
1. Clone the plugin repository by using the command line interface as follows:
git clone https://github.com/zsh-users/zsh-syntax-highlighting.git ${ZSH_CUSTOM:-~/.oh-my-zsh/custom}/plugins/zsh-syntax-highlighting
2. Access the file named.zshrc:
nano ~/.zshrc
3. Add zsh-syntax-highlighting to the list of plugins by navigating to the plugins section and scrolling down:

4. Save your changes and close the document.
5. To enable syntax highlighting, restart the terminal and launch Zsh. For instance, typing a command incorrectly highlights it in red, while typing it correctly highlights it in green:

In the preceding example, we used the echo command to demonstrate how highlighting functions.
Eliminate Zsh
If you choose to uninstall Zsh and go back to the previous shell, take the following actions:
1. Run the following command to remove the zsh package from the computer:
sudo apt --purge remove zsh
When prompted, enter y and then If you want to Remove Zsh please press Enter.
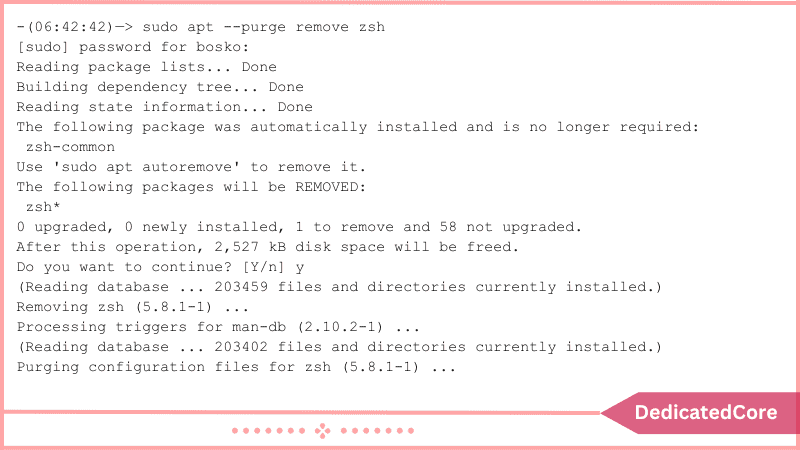
A package’s dependencies and any associated configuration files are also deleted when it is purged, along with the package itself.
2. Return Bash (or any other shell you want) to the default position:
chsh -s $(which bash)
3. To make the modifications effective, close the terminal and start a fresh session.
Final words on Installing and Setup Zsh in Ubuntu
For your command-line interactions, integrating Zsh into your Ubuntu environment can be a game-changer. It is a favorite among developers and power users due to its extensibility. Also, Potent auto-completion, and customization options. You’ve learned how to install Zsh on your Ubuntu system here. Which opens the door to a command-line experience that is more effective and pleasant. By Installing Samba on Ubuntu, you can enable absolute file sharing across different OS that provides efficient help management in your local network.
You may now further customize your shell to match your unique demands. Increase your productivity in the Linux environment. The Zsh shell for Ubuntu was installed and set up using the instructions in this article. Zsh is gaining popularity even though Bash is still used. It’s frequently used as the default shell on Linux systems.
Frequently Asked Questions (FAQ)
1. How do I Install Zsh on Ubuntu?
For Installing Zsh on Ubuntu with the following commands:
Updating the package list with:
sudo apt update
Installing Zsh with:
sudo apt install zsh
2. How do I Update Zsh or Oh My Zsh?
Update Zsh with the following command:
sudo apt update && sudo apt upgrade zsh
Update Oh My Zsh by Running the following command:
omz update
3. How do I Enable Auto-Suggestions in Zsh?
Enable Auto-Suggestions in Zsh:
install the zsh-autosuggestions plugin and add it to the plugins section in .zshrc

